Summary
Catalog Pricing controls what prices you and your customers see when browsing products in eCat Online. You can display cost, retail, a custom markup, or hide prices entirely - and switch between them at any time.
Quick Start
Need to change your displayed pricing right now? Here is how:
- Click your profile icon in the top left corner
- Select My Account
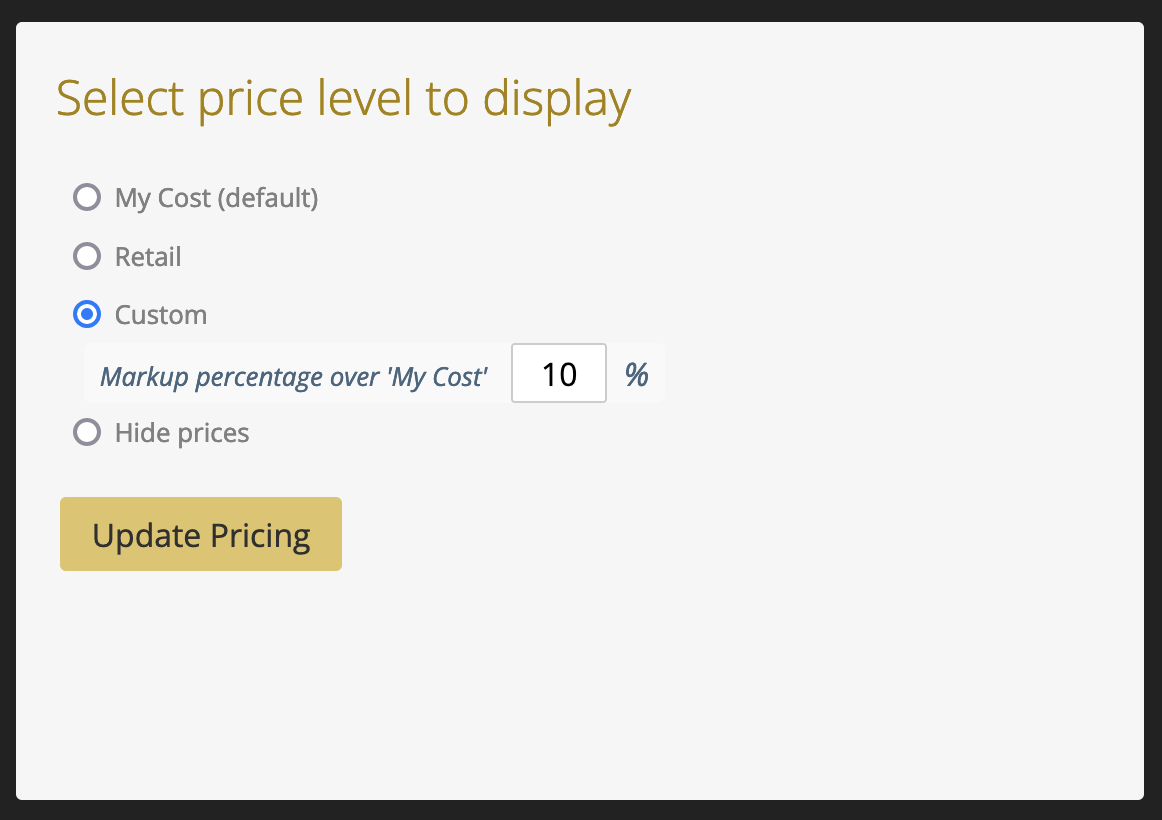
- Choose your preferred pricing option (Cost, Retail, Custom, or None)
- If using Custom, enter your markup percentage
- Click Update Pricing
Note: Your pricing selection is saved per browser, not per user account. This lets multiple employees on shared logins use different pricing displays.
How It Works
Understanding Price Levels
SuperCat uses Price Levels to control what prices different users see. Rather than separate retail and wholesale prices, the system applies a factor (multiplier) to a base product price. Common configurations include:
- Cost - The base price stored on the product (often called net price)
- Retail - Base price multiplied by a factor (commonly 2x or 3x)
- Custom markup - Your cost plus a percentage you specify
How Customer Pricing Is Determined
When a customer is selected in eCat, the system checks their assigned price level. This is controlled by the customer's 'default_price_code' setting in the Admin Console. If a customer has a specific price code assigned, that price level automatically applies to all their transactions.
Important: If a user profile has both a rep/territory number AND a customer number assigned, the customer number takes priority. This is why some reps may see unexpected pricing - the system treats them as a customer.
Step-by-Step Setup
Changing Your Catalog Display Pricing
To change the prices displayed in your eCat Online catalog:
1. Access My Account
Click on your profile in the top left corner, then go to My Account.
2. Select Your Pricing Option
Choose from:
- Cost - Shows your wholesale/net price
- Retail - Shows the retail price level
- Custom - Adds a markup percentage to your cost
- None - Hides all pricing
3. Configure Custom Markup (if applicable)
For Custom pricing, enter a markup percentage. Specifying 50 will mark up a $100 cost item to $150. The markup is always based on your cost, not the retail price.
4. Save Your Selection
Click Update Pricing to apply your changes.
Project Email Pricing
You can specify different pricing when sending project emails. The pricing in the email does not need to match your catalog display. For example, use a 50% markup in the catalog but send a project email with 40% markup.
Troubleshooting
Why is a customer seeing a different price than expected?
- Check the customer's assigned price level in Admin Console > Customers
- Verify their 'default_price_code' field matches the intended price level
- Check if any promotions or special pricing rules are active
- Confirm currency settings match the customer's region
Why can I only see one price level?
If your user profile has a customer number assigned, it overrides your rep-level price level access. Contact your admin to either:
- Remove the customer number from your profile (if you should have full rep access), or
- Confirm you should only have access to that customer's price level
Why is the price level not applying correctly?
- Verify the customer's profile has the correct 'default_price_code'
- Check if volume thresholds affect the price (quantity break pricing)
- Confirm the price level is authorized for your user type
My prices are rounding differently than expected
If you need exact pricing control, ask your admin about using Imported/Ad-hoc price levels instead of Arithmetic. Arithmetic price levels apply a factor and round; Imported price levels use the exact price you specify.
Need more help?
Contact Support with a screenshot of the pricing discrepancy and details about the customer account in question.